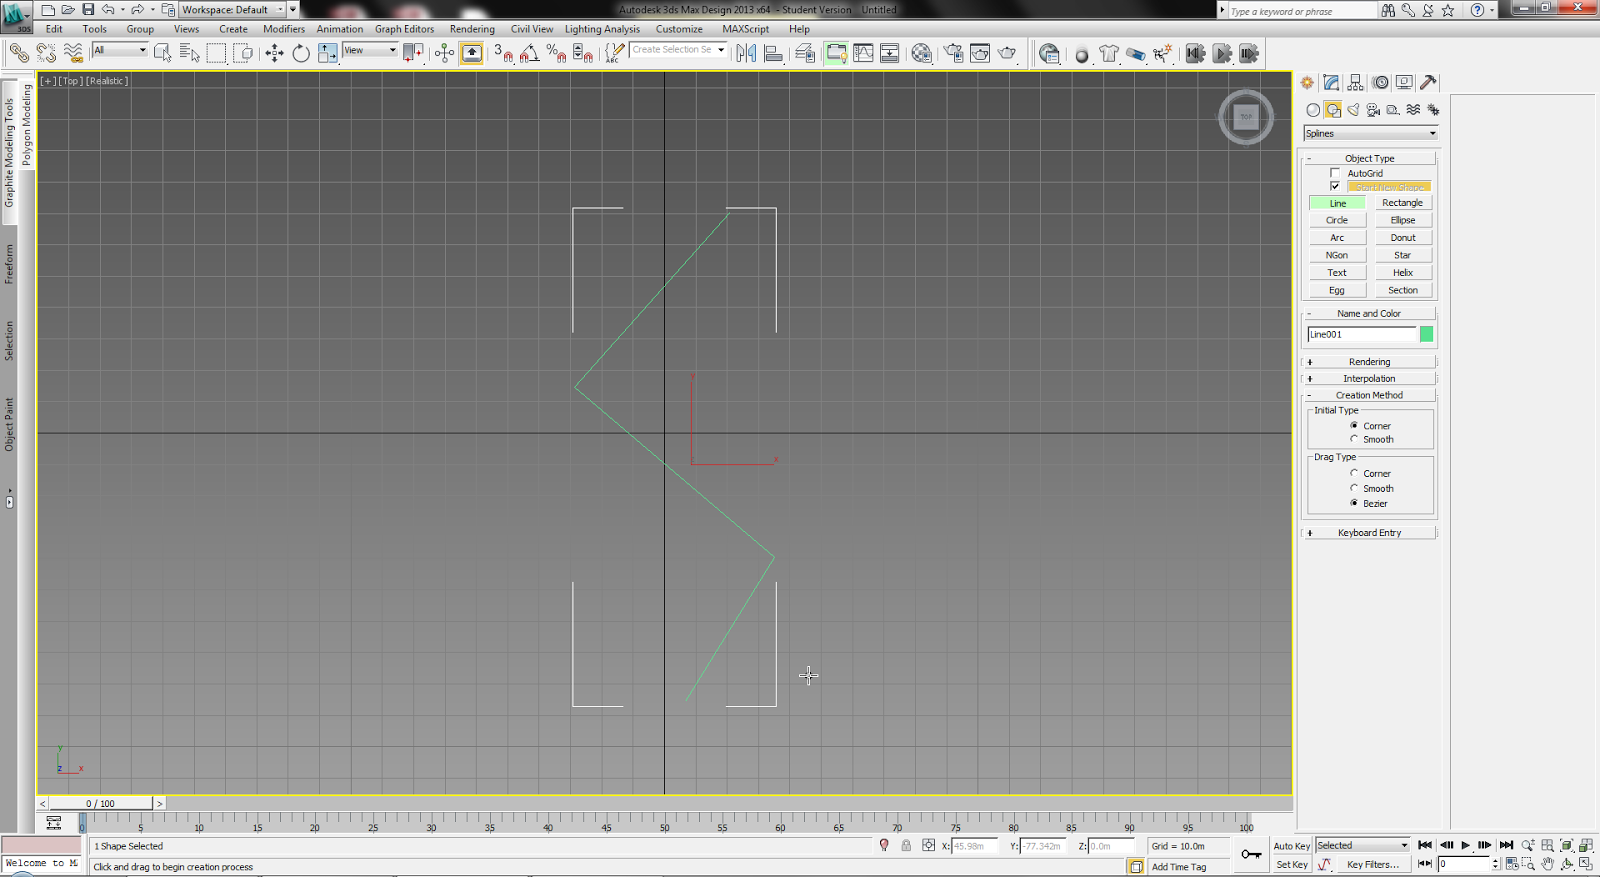
1. First you have to create a path. Create a line like the one shown below:
2. Select all the middle vertices, right click and select smooth from the drop-down menu:

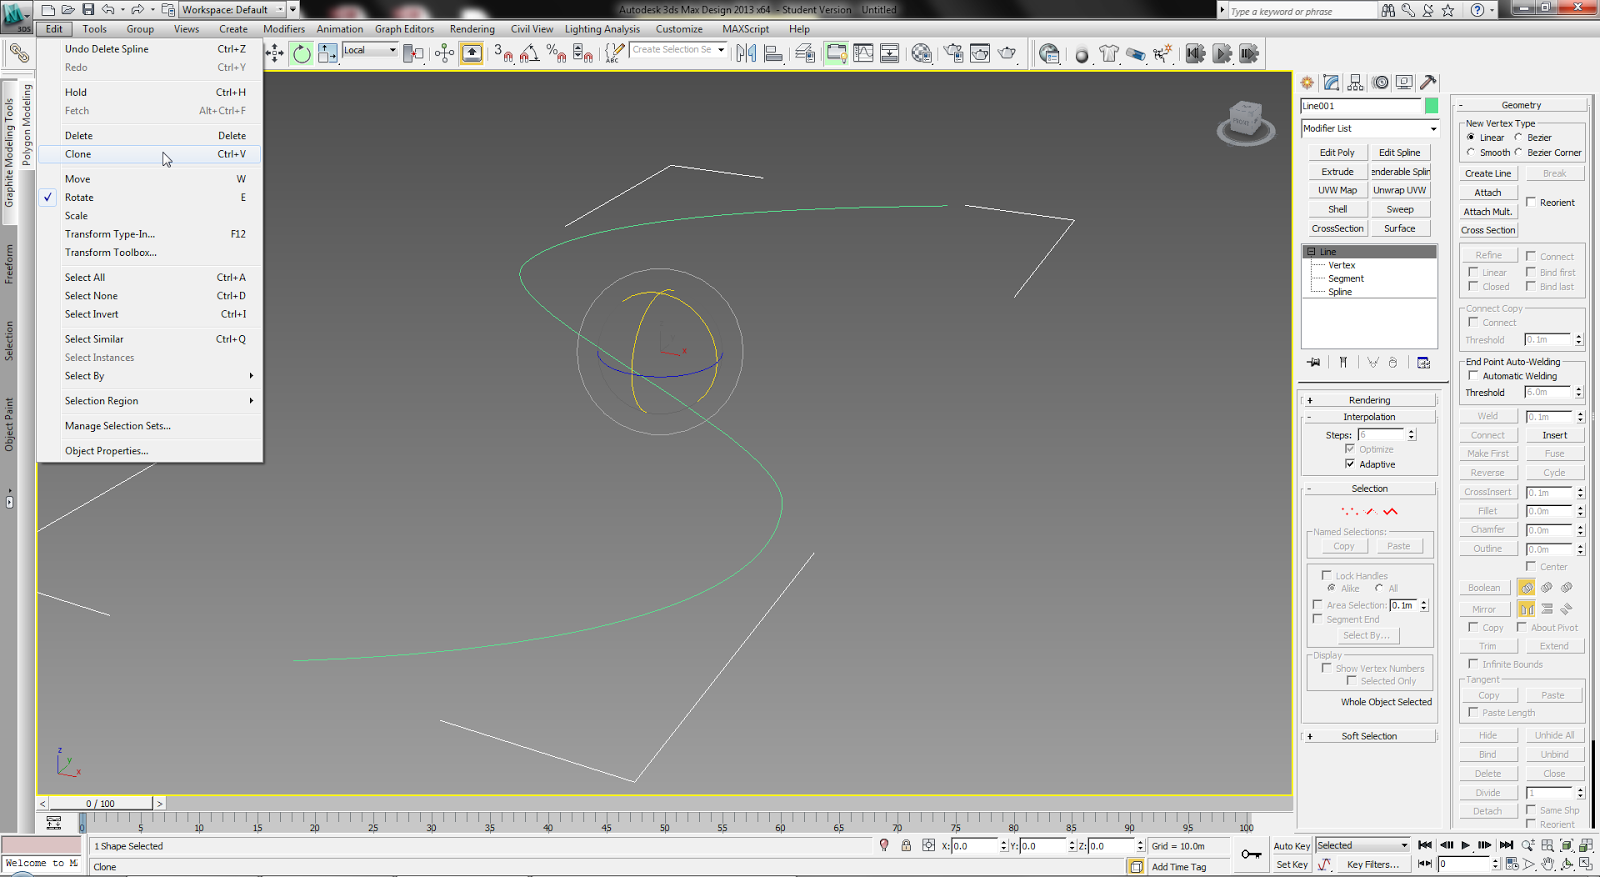
3. Next, you will have to duplicate the line. Select the line and then select Edit/Clone from the Menu (or press Ctrl+V on your keyboard):
4. Then you have to give width to the path. Select the spline sub-object and change the outline value to whatever works for your scene. In the example below it is 14m:

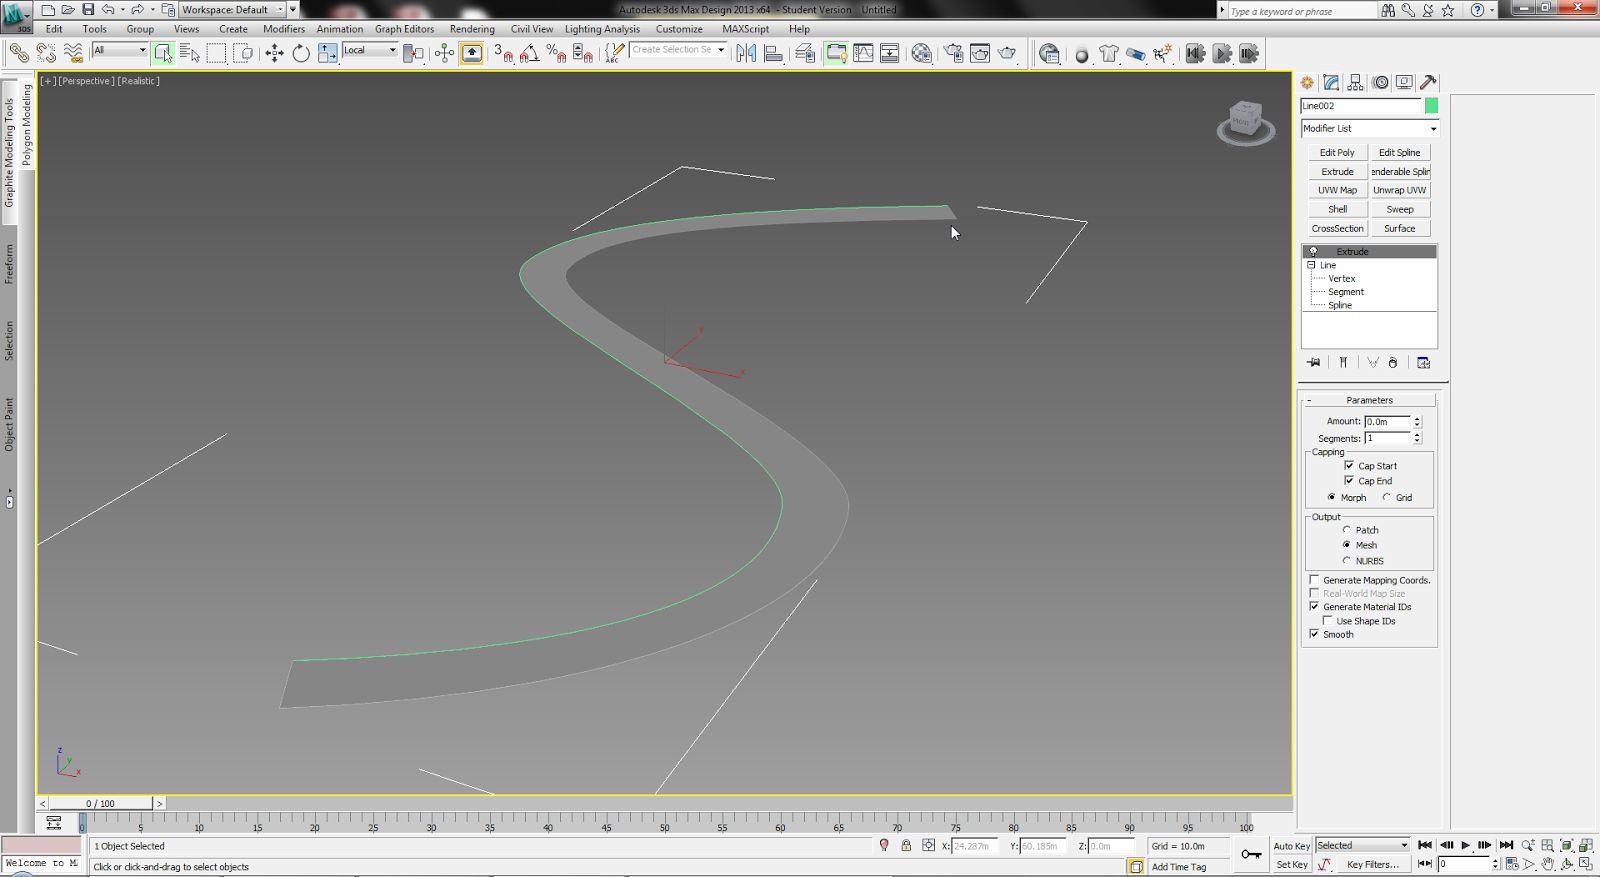
5. Now you have to extrude the path. Select the outlined line, and add an Extrude modifier from the drop-down menu, with amount 0:
6. Let's now add a tile material to the path. You can add any tiling material you want. In the example below I used a simple Standard material with a Tiles map on the diffuse slot:


7. Assign the material to the line and make sure "Show Shaded Material in Viewport" is highlighted:

8. Now to map the tiles correctly on the path, add the Unwrap UVW map from the drop-down menu. Next, select the "polygon" from the Selection menu and select the path's top polygon:

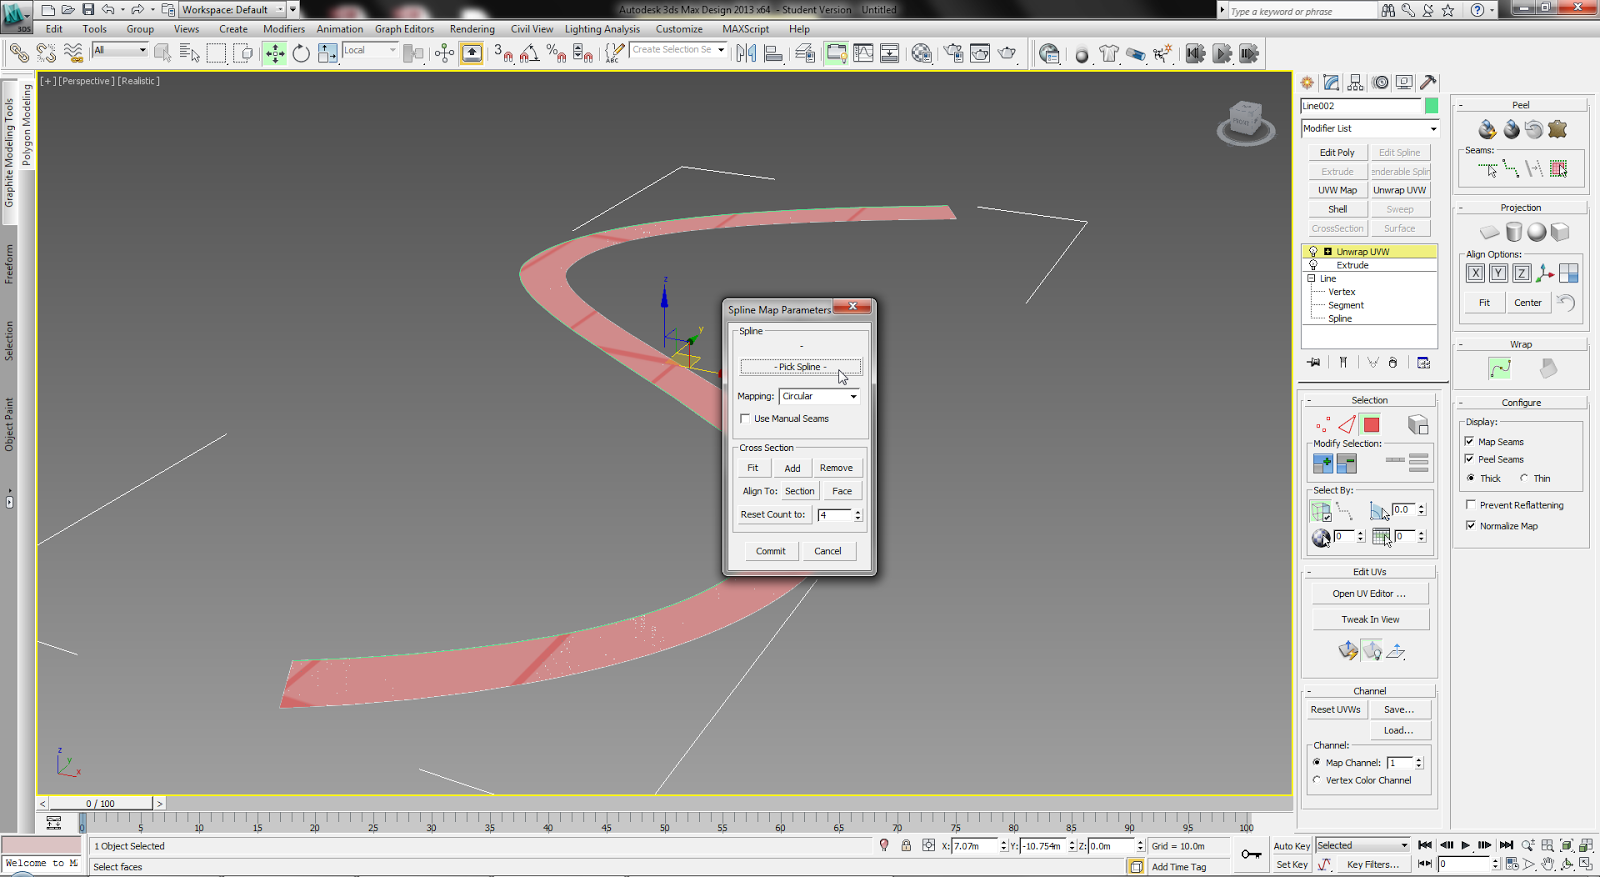
9. Now, to map correctly on the path, select Spline Mapping under Wrap, in the Unwrap UVW modifier parameters. Click on Pick Spline and select the line that you had created in Step 3 and make sure you select Planar Mapping:

10. Finally, change the Tiling in your material, to fit your path:

2. Select all the middle vertices, right click and select smooth from the drop-down menu:
3. Next, you will have to duplicate the line. Select the line and then select Edit/Clone from the Menu (or press Ctrl+V on your keyboard):
4. Then you have to give width to the path. Select the spline sub-object and change the outline value to whatever works for your scene. In the example below it is 14m:
5. Now you have to extrude the path. Select the outlined line, and add an Extrude modifier from the drop-down menu, with amount 0:
6. Let's now add a tile material to the path. You can add any tiling material you want. In the example below I used a simple Standard material with a Tiles map on the diffuse slot:
7. Assign the material to the line and make sure "Show Shaded Material in Viewport" is highlighted:
8. Now to map the tiles correctly on the path, add the Unwrap UVW map from the drop-down menu. Next, select the "polygon" from the Selection menu and select the path's top polygon:
9. Now, to map correctly on the path, select Spline Mapping under Wrap, in the Unwrap UVW modifier parameters. Click on Pick Spline and select the line that you had created in Step 3 and make sure you select Planar Mapping:
10. Finally, change the Tiling in your material, to fit your path:


